Saturday, September 27, 2014

Roofing and Walls

These four pictures are very interesting. I took them all within two minutes of each other and did not touch them in Photoshop except to size them for the web.  Notice the different color of the sky from taking the pictures at different locations from the sun.  
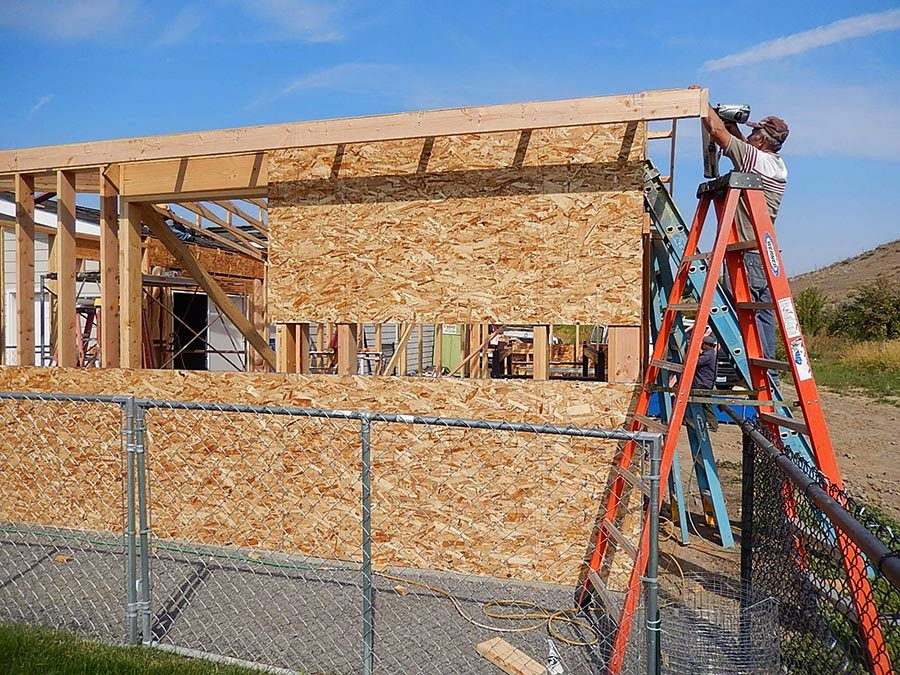
Ben and Bob put up the rest of the particle board on the east wall. At the beginning of the week they will begin putting in the windows. 

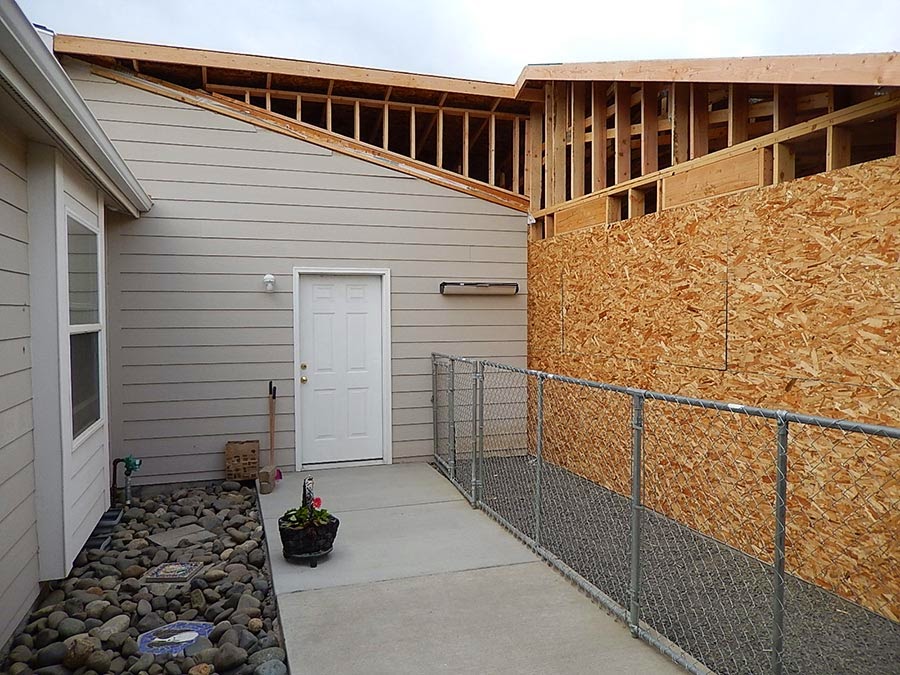
The last remaining particle board above the garage was also put in place.

The roofer was almost able to complete the roof before the weekend and considering the amount of rain we got last week it was no easy task. The south side of the roof, shown here, is done.

The roofer only has a little bit of remaining work on the east side of the addition and replacing some of the roof over the garage.  

Wednesday, September 24, 2014

East Wall, Pump Room and Roof

Several things were happening yesterday.  Western Materials delivered the roofing materials first thing in the morning.


We have had weeks of very hot weather until the roofing materials were delivered. Wouldn't you know it, it is raining today.
Ben and Bob framed the east wall and the pump room.


In the afternoon the roofer began laying the ice barrier on the roof. The ice barrier covers the first three feet beginning at the edge of the roof and then the remaining roof is covered with 15 pound tar paper.


Friday, September 19, 2014

Walls & Roof Particle Board

Construction is moving right along on the new addition. Ben was able to get extra help this week to work on the trusses, and particle board covering the walls and roof. The angle of the roof where it attaches to the existing garage will prevent water run-off from dumping down on the sidewalk.  
The construction experts answered my question about why they cover the windows and doors with the particle board instead of cutting it around the framed openings. This is done so that there are as few seams as possible in the walls and to reduce waste. If an error was made while cutting the particle board to frame the windows it could not be used. They have a special saw that allows them to cut out the particle board around the frame for the windows and door.  

This is the last wall that requires framing. Roofing material will be delivered on Tuesday of next week. When the siding is complete and the roofing material installed the electrician will begin his job.


Tuesday, September 16, 2014

Framing and Trusses

Ben had extra people available today to continue working on framing and to get the trusses in place. The same guys will be back tomorrow.  


I have not been able to ask Ben why the plywood is placed over the window openings, but I will try and get an answer tomorrow.  


We are having a hard time picturing how the garage roof and the roof to the new addition will meet. All we know is that Ben is having to do something special with the design to keep rainwater from running off the roof on to the sidewalk.

As soon as the plywood is in place and the door installed, we can take the fence down that is keeping the dogs out of the construction area.


Saturday, September 13, 2014

Framing


Ben only had help one day this week and as a result the framing process has been going slowly. In this picture, Bob is in the foreground and you can see the opening for the door to his right. Ben is in the background working on the frame for the north wall.


In the picture below notice the openings for four windows on the north (far) wall. Three of the windows are small frosted windows (near the top of the wall) that do not open, while the fourth larger window is in the pump room. There are two windows in the pump room and both windows open for cross ventilation. On the back wall, under the second small window, the framed opening is visible for the cold-air return vent. 


We wanted to see the frame first before we determined the height of the large windows on the south (facing the lawn) and west (closest to the house) walls. Seeing the wall framed first really helped us determine how high to place the windows.  


Finally the large windows on the south wall and west wall have been framed. The plan right now is to complete the framing process on Monday and install the trusses on Tuesday.

Wednesday, September 10, 2014

Mudsill & Demolition

Yesterday, Ben put the mudsill on the concrete foundation. Mudsill adds to the integrity of the overall construction while providing a means of attaching the framing components.
Next, Ben took down the storm drain, roofing and siding from the garage. This is where the pool room will be attached.

The next step is to put up the framing and tresses. We should have what looks like a building by the end of the week. YEA!

Friday, September 5, 2014

Pouring the Concrete Floor

Today, Ron, Kevin and Dusty poured the concrete floor. The pump room will end up with concrete for the floor, while the rest of the addition will be covered with tile. Click on a picture to enlarge it and to click through the slide show.


Smoothing out the floor in the hot tub area.


Pouring concrete into what will be the floor in the pump house.


The guys had to move the frame for the dehumidifier unit to get the truck closer to the addition floor. Here, Ron is putting the frame back in place so they can pour the concrete for the pad that will hold the dehumidifier unit.


Kevin is starting the first stage of smoothing out the concrete.


Pouring the dehumidifier unit pad.


Continuing to smooth out the concrete.


Kevin using the edging tool.


Smoothing step 2.


The bottom of the pool area required grinding to get the concrete smooth enough to avoid tearing the liner.


The floor is poured, smoothed out and drying.


After the concrete truck pulled out, lumbar for the frame was delivered.


The trusses were also delivered today. Ben, our contractor will lay out the design on Monday and begin framing on Tuesday, September 9.


Wednesday, September 3, 2014

Hot Tub & Pump Room

Yesterday the electrical conduit was installed for the pump room. As soon as it passes inspection, the floor can be poured.  The red spray paint on the ground indicates where the pumps and pool heater will sit in the pump room and outlines the hot tub.  You can also see two floor drains, one in the pump room and one next to the hot tub. The heating system for the room will sit outside the new addition. 


The curved line in the foreground of this picture shows how the door to the pump room opens into the pool room. Two of the pumps will be stacked on top of each other to save space. We will also have shelves in the pump room for the hot tub supplies.  


When the hot tub is moved indoors the electrical line from the control box will run under the floor and up under the  hot tub so we won't trip over it like we do now. If you look closely you can see one gray pipe sticking up inside the red paint outline.  The electrical line will run from this to the control box, the cable for which you can see next to the foundation about two feet from the wall board.  


We are excited to have the flour poured because the guys can start framing after the inspections are complete.